How to Sign RDP Files and Fix the Security Warning
The April 2026 Windows security update changed how unsigned RDP files are handled. Every time you open an unsigned .rdp file, you now get a red “Caution: Unknown remote connection” warning, and there’s no way to tick a box and make it go away.
Local resource redirections like clipboard and drive sharing are also blocked by default until you manually re-enable them on each connection.
The proper fix? Digitally sign your RDP files. A signed file shows a verified publisher name in the connection dialog, replaces the red warning with a normal prompt, and lets your redirections work as configured.
In this article
- Why is signing RDP files needed?
- Choosing Your Certificate
- Option 1 Self-Signed Certificate
- Option 2 Active Directory / Enterprise CA
- Signing the RDP File
- Important Re-sign After Any Changes
- Wrapping Up
In this article, I will show you how to sign your own RDP files, both self-signed and for corporate environments.
Why is signing RDP files needed?
Signing RDP files has always been a best practice, but it’s one that most people never bothered with because it was easy to ignore. The old warning had a “don’t ask me again” checkbox, so you clicked through it once and forgot about it.
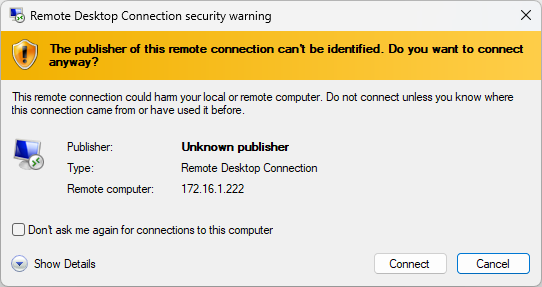
The April 2026 security update changed that. The checkbox is gone, and the warning now appears every single time you open an unsigned RDP file. For anyone using RDP connections daily, this will become annoying fast. The solution is to sign your RDP files, which is not that difficult.
There’s a good reason Microsoft made the change. RDP files are frequently misused in phishing attacks. A malicious RDP file sent via email looks identical to a legitimate one, and a user who has been trained to click through RDP warnings without reading them is an easy target.
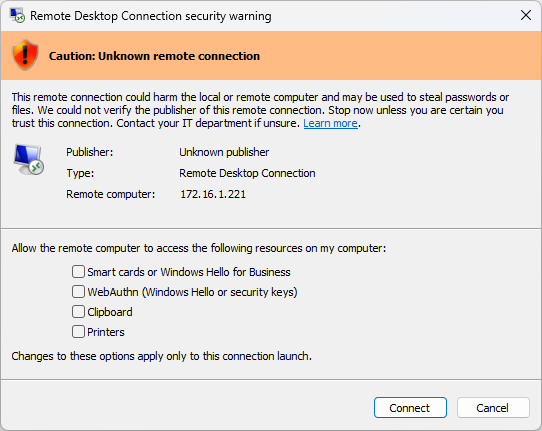
This is where signing actually matters beyond just fixing your own annoyance. When you sign your own RDP files, the warning becomes meaningful again. Your connections open cleanly with a verified publisher name. Any unsigned or tampered file still triggers the full red warning, and now that warning can’t be dismissed, users are much more likely to stop and think before clicking through it.
So signing your files isn’t just about getting rid of the dialog. It’s about making the security warning effective for the cases where it actually counts.
Requirements
The good news is that everything you need is already on your Windows machine:
rdpsign.exe– built into Windows atC:\Windows\System32\rdpsign.exe- PowerShell running as Administrator
- A code signing certificate (we’ll create one below)
- Your configured
.rdpfile
Choosing Your Certificate
There are two main options depending on your environment:
Self-signed certificate
This is the perfect choice for home users, IT pros connecting to their own machines, and small environments without Active Directory. It’s free, takes a few minutes to set up, and works perfectly as long as you trust the certificate on each machine that needs to open the signed files.
Enterprise CA certificate
If you have an Active Directory, then we can use the Active Directory Certificate Services in your environment. All domain-joined machines automatically trust certificates from your internal CA, so you don’t need to manually install anything on client machines. And it allows you to manage everything centrally via Group Policy.
Option 1: Self-Signed Certificate
The easiest method to sign an RDP file is using the self-signed method.
Step 1 – Create the Certificate
Open PowerShell as Administrator and run:Copy
$cert = New-SelfSignedCertificate ` -Type CodeSigningCert ` -Subject "CN=RDP Publisher, O=LazyAdmin" ` -KeyUsage DigitalSignature ` -FriendlyName "RDP Signing Certificate" ` -CertStoreLocation "Cert:\LocalMachine\My" ` -NotAfter (Get-Date).AddYears(3)
Adjust the -Subject value to something that makes sense for you. This is the publisher name that will appear in the RDP connection dialog.
Step 2 – Trust the Certificate on This Machine
For the signed file to show as trusted, the certificate needs to be in both the Trusted Root CA store and the Trusted Publishers store:Copy
# Trust the certificate on this machine$certPath = "Cert:\LocalMachine\My\$($cert.Thumbprint)"Import-Certificate -FilePath (Export-Certificate -Cert $cert -FilePath "$env:TEMP\rdp-signing.cer" -Force).FullName -CertStoreLocation "Cert:\LocalMachine\Root"Import-Certificate -FilePath "$env:TEMP\rdp-signing.cer" -CertStoreLocation "Cert:\LocalMachine\TrustedPublisher"
Step 3 – Export the Certificate for Other Machines
If you want signed files to show as trusted on other machines too (for example, a colleague connecting to the same server), export the public certificate and install it there:Copy
Export-Certificate -Cert $cert -FilePath "C:\Certs\rdp-signing-public.cer"
Then on each other machine, run as Administrator:Copy
Import-Certificate -FilePath "C:\Certs\rdp-signing-public.cer" -CertStoreLocation "Cert:\LocalMachine\Root"Import-Certificate -FilePath "C:\Certs\rdp-signing-public.cer" -CertStoreLocation "Cert:\LocalMachine\TrustedPublisher"
The next step is to sign your RDP files, which I will explain further down in the article.
Option 2: Active Directory / Enterprise CA
If your domain already has Active Directory Certificate Services (AD CS) set up, this is the cleanest solution. Every domain-joined machine automatically trusts your internal CA, so signed RDP files just work on all your machines without any manual certificate distribution.
Step 1 – Check If You Already Have an Enterprise CA
Before setting one up, check whether your domain already has AD CS running. Open PowerShell on your domain controller and run:Copy
Get-WindowsFeature -Name ADCS-Cert-Authority
If InstallState shows Installed, you already have a CA and can skip straight to Step 3.
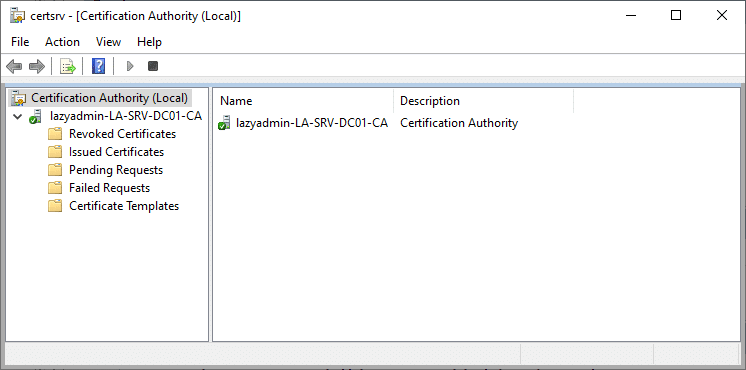
You can also check via the Certification Authority console – press Win + R, type certsrv.msc. If it opens and shows your CA, you’re good to go.
Step 2 – Install Active Directory Certificate Services
If AD CS isn’t installed yet, you can set it up on your domain controller. You’ll need to be a member of both the Domain Admins and Enterprise Admins groups.
First, install the role:Copy
Install-WindowsFeature -Name ADCS-Cert-Authority -IncludeManagementTools
Then configure it as an Enterprise Root CA:Copy
Install-AdcsCertificationAuthority ` -CAType EnterpriseRootCA ` -CACommonName "YourDomain-CA" ` -KeyLength 2048 ` -HashAlgorithmName SHA256 ` -ValidityPeriod Years ` -ValidityPeriodUnits 10 ` -Force
Adjust -CACommonName to something that makes sense for your organization, like LazyAdmin-CA. The -Force flag skips the confirmation prompt.
After this completes, the CA is immediately active, and all domain-joined machines will start trusting certificates issued by it at the next Group Policy refresh.
NoteSetting up AD CS makes permanent changes to your Active Directory. If this is a production environment and you’re not sure, test it in a lab first. For most small to mid-size environments an Enterprise Root CA is the right and simplest choice.
Step 3 – Enable the Code Signing Certificate Template
By default, the Code Signing template exists in AD CS but isn’t published for enrollment. You need to enable it to request a certificate.
- Open the Certification Authority console (
certsrv.msc) - Expand your CA
- Right-click Certificate Templates
- Choose New > Certificate Template to Issue.
- Select Code Signing from the list and click OK.
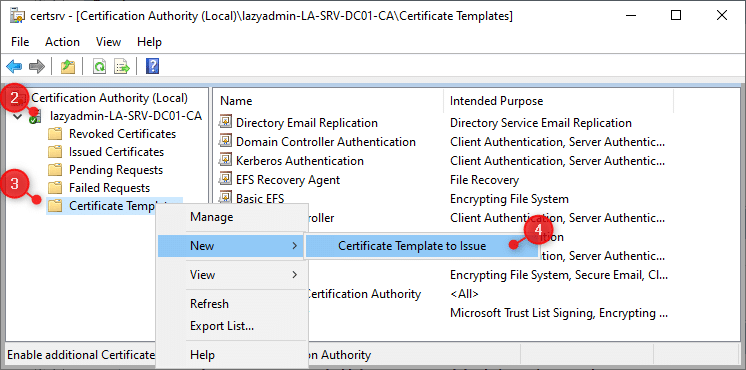
We can, of course, also use PowerShell to add the Code Signing Template:Copy
Add-CATemplate -TemplateName "CodeSigning"
Step 4 – Request the Code Signing Certificate
Now request the certificate on the machine you’ll use for signing the RPD file. Open PowerShell as Administrator:Copy
Get-Certificate -Template "CodeSigning" -CertStoreLocation "Cert:\CurrentUser\My"
Verify it was issued correctly:Copy
Get-ChildItem Cert:\CurrentUser\My | Where-Object { $_.EnhancedKeyUsageList -match "Code Signing" }
You should see your new certificate with your domain CA as the issuer.
To deploy the certificate to other domain computers, we need to export the cert and store it somewhere where the domain controller can access it.Copy
# Get the certificate$cert = Get-ChildItem Cert:\CurrentUser\My | Where-Object { $_.EnhancedKeyUsageList -match "Code Signing" }# Export the cert - copy it from temp to a place where the DC can access itExport-Certificate -Cert $cert -FilePath "C:\Temp\rdp-signing.cer
Step 5 – Deploy Certificate Trust and RDP Settings via Group Policy
Even though domain machines automatically trust your CA, you’ll want to push the certificate into the Trusted Publishers store via GPO so signed RDP files show as fully trusted without any additional prompts.
- Open Group Policy Management Console (
gpmc.msc) - Create or edit a GPO linked to the appropriate OU
- Navigate to Computer Configuration > Windows Settings > Security Settings > Public Key Policies > Trusted Publishers
- Right-click Trusted Publishers, select Import, and import your
.cercertificate file
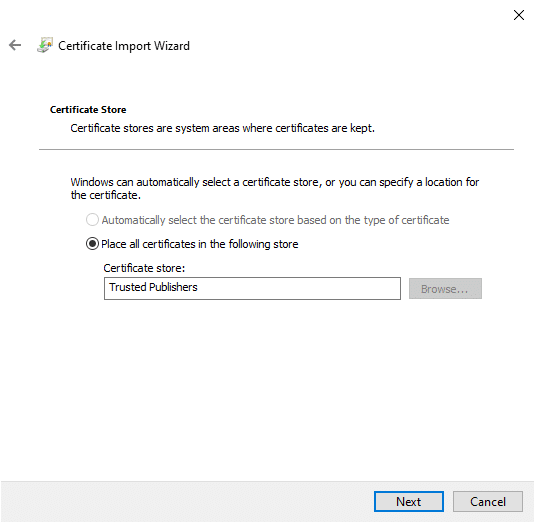
You can also configure RDP trust centrally so machines recognize your signing certificate without waiting for the Trusted Publishers policy to propagate.
Navigate to: Computer Configuration > Administrative Templates > Windows Components > Remote Desktop Services > Remote Desktop Connection Client
Add your certificate thumbprint to Specify SHA1 thumbprints of certificates representing trusted .rdp publishers.
Signing the RDP File
Once you have your certificate in place, signing is straightforward. First, get your certificate thumbprint:Copy
$thumbprint = (Get-ChildItem Cert:\CurrentUser\My | Where-Object { $_.EnhancedKeyUsageList -match "Code Signing" } | Select-Object -First 1).Thumbprint
Then sign your RDP file:Copy
rdpsign.exe /sha256 $thumbprint "C:\Path\To\Your\File.rdp"
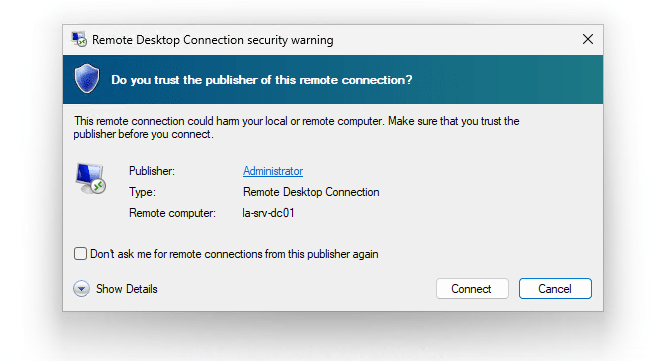
When you open the RDP connection after you have signed the RDP file, you will now only get a normal warning, which you can mark as “don’t ask me again”:
Signing Multiple Files at Once
If you have several RDP files to sign, you can do them all in one go:Copy
$thumbprint = "YOUR_THUMBPRINT_HERE"Get-ChildItem "C:\RDP\*.rdp" | ForEach-Object { & rdpsign.exe /sha256 $thumbprint $_.FullName Write-Host "Signed: $($_.Name)"}
Important: Re-sign After Any Changes
One thing to keep in mind, if you modify an RDP file after signing it, the signature is invalidated, and the warning comes back. This includes any change to the file, even a small one. Always sign your RDP files as the last step after you’ve finished configuring them.
Wrapping Up
Signing your RDP files is the right way to deal with the new security warning. It takes a few minutes to set up, and once it’s done, you won’t see the red warning again for those files. More importantly, it actually improves security rather than just hiding the warning, anyone who tampers with a signed file will immediately trigger the red banner again.
For home use and self-managed machines, the self-signed route works well. For corporate environments with Active Directory, the Enterprise CA option gives you central control and zero manual work on client machines.
Добавить комментарий